Why Choose 900×600 Council Paving Slabs for Your Project
Picking the right paving material makes all the difference in large-scale outdoor projects. The 900×600 council paving slabs are a standout choice that works great in many ways. These big concrete flags blend practicality and performance in a way that’s perfect for both commercial and residential projects.
🔗 Useful Links
Internal:
Ideal for High Traffic and Public Use Areas 🚶♂️
These council paving slabs are built to handle constant foot traffic and heavy use year-round. The 900×600 concrete slabs are 50mm thick, which makes them more durable than standard domestic slabs. The hydraulically-pressed manufacturing gives them extra strength compared to wet-cast decorative concrete slabs.
You’ll notice a distinctive pimpled or dotted pattern on the surface that helps prevent slips and falls. This safety feature really shines in:
- Public pathways and pedestrianised zones
- Shopping precincts and commercial areas
- School playgrounds and communal spaces
- Outdoor seating and dining areas
The slabs meet British Standard BS EN 1339:2003 requirements, which gives councils and commercial developers confidence in their durability and performance for high-footfall areas.
Cost-Effective Alternative to Resin or Asphalt 💰
Council slabs are a smart financial choice among paving options. Resin-bound driveways cost between £70-£100 per square metre, and tarmac runs around £90 per square metre. Council paving costs less while maintaining quality.
These concrete slabs need minimal maintenance, which saves money over time. Unlike resin or asphalt surfaces that need regular care, council slabs are easy to maintain. The savings add up throughout your installation’s lifetime.
Damaged slabs can be replaced individually, unlike surfaces that need complete resurfacing. This targeted repair option makes council paving economical in areas prone to occasional damage.
Standard domestic paving often lacks the strength needed for high-traffic areas. Council slabs might cost similar to other options upfront, but their durability makes them more economical long-term.
Availability of Council Paving Slabs 900x600x50mm Near Me 🔍
You can find 900x600x50mm council slabs easily throughout the UK. These commercial-grade concrete flags are stocked by:
- Builder’s merchants like Travis Perkins
- Specialist paving suppliers such as Paving Direct
- Online retailers with nationwide delivery
- Local landscaping centres and building suppliers
Delivery services are available from most suppliers. Standard shipping to UK mainland areas (Zone 1) is often free, though remote locations might cost extra.
Look for slabs manufactured to British Standards (BS EN 1339) to ensure quality. Suppliers also stock complementary products like jointing compounds and sealers to complete your installation.
📋 FAQs About 900×600 Council Paving Slabs
Can council paving slabs be used for residential projects? Yes! These robust slabs work great in residential driveways, patios, and garden pathways where you need extra durability.
How thick are standard council paving slabs? Council paving slabs come in 50mm thickness, with 60mm and 70mm options available for projects that need extra strength.
What colour options are available? Light grey is the main colour, though some suppliers offer limited variations. This neutral tone fits well with most architectural styles and landscaping schemes.
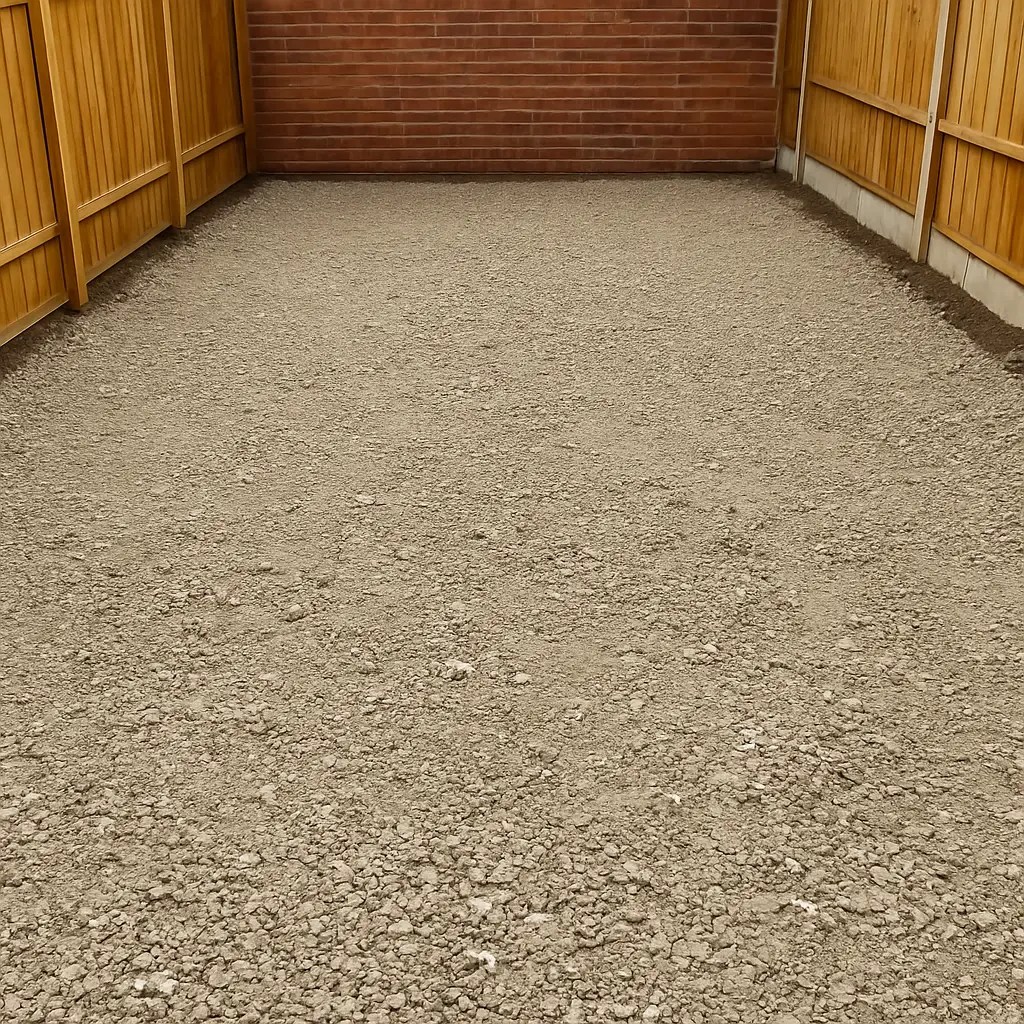
Preparing the Ground for Installation
Good ground preparation creates the foundations for a soaring win with your paving project. You might want to rush through this stage at first, but this vital phase ended up determining how level, stable, and long-lasting your 900×600 council paving slabs will be. Let’s look at the essential preparation steps that will make your installation last.
Excavation Depth and Sub-base Requirements 🛠️
Your first task in preparing council paving slabs is calculating the right excavation depth. The right excavation prevents future sinking and movement of the slabs.
For 900×600 council paving slabs, you need to dig approximately 200mm deep. Here’s what makes up that depth:
- 150mm for compacted MOT Type 1 sub-base
- 50mm for mortar bed
- The slab thickness (usually 50mm for council slabs)
- Extra depth needed for drainage gradient
Dig at least 100mm beyond your planned paved area in all directions to give enough edge support. If you’re paving next to a house, keep the finished level at least 150mm below the damp proof course (DPC) to stop damp problems.
Areas with poor drainage or clay soil need deeper excavation and a layer of geotextile membrane between the ground and sub-base. This stops the MOT Type 1 from sinking into softer ground below.
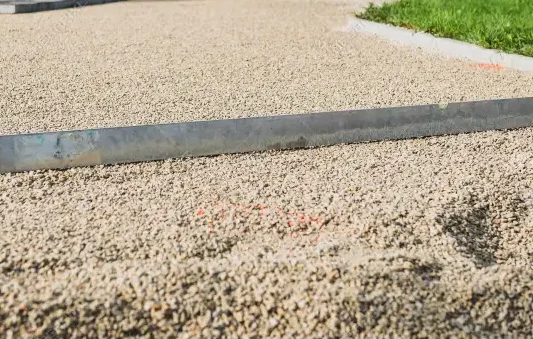
Compacting MOT Type 1 for Stability 🧮
MOT Type 1 works best as sub-base material for 900×600 council slabs. This crushed aggregate combines materials from 40mm down to dust and gives excellent load-bearing strength.
Here’s how to install it:
- Spread MOT Type 1 in layers no thicker than 75mm
- Compact each layer fully before adding more
- Keep going until you get a compacted thickness of 150mm
Good compaction is vital – anything not compacted during installation will settle over time and cause uneven spots. A vibrating plate compactor (wacker plate) gives the best results. You can rent one for about £25 per day.
MOT Type 1 compacts down by about 25-30% from its loose depth. You’ll need to factor this in when ordering materials. Council slabs that will have vehicles driving on them need at least 150mm of compacted sub-base.
Ensuring Proper Drainage and Gradient 📏
Good drainage stops water pooling that can damage your paving and create dangerous slippery surfaces. Your paving needs a slight gradient to let water run off.
Here are the gradient recommendations for 900×600 concrete council slabs:
- Standard gradient for concrete slabs: 1:80 (drops 1cm for every 80cm of paving)
- Natural stone or riven slabs need 1:60 (steeper to reduce puddling)
Slope the paving away from buildings when possible. If you must slope towards a structure, add a drainage channel or gravel trap (100mm width) next to the building.
Cross-fall (gradient across width) should be 2.5% (1 in 40), while longitudinal fall (along length) needs at least 1.25% (1 in 80).
❓ FAQs About Ground Preparation for Council Paving
Q: Can I lay council paving slabs directly on soil? A: No. This might look like a shortcut, but direct soil laying leads to uneven settling, cracking, and your paving won’t last nearly as long.
Q: What’s the difference between sharp sand and building sand for paving projects? A: Sharp sand goes into bedding mortar because it’s stronger and sticks better to slabs. Building sand works better in pointing mixes since it’s more flexible.
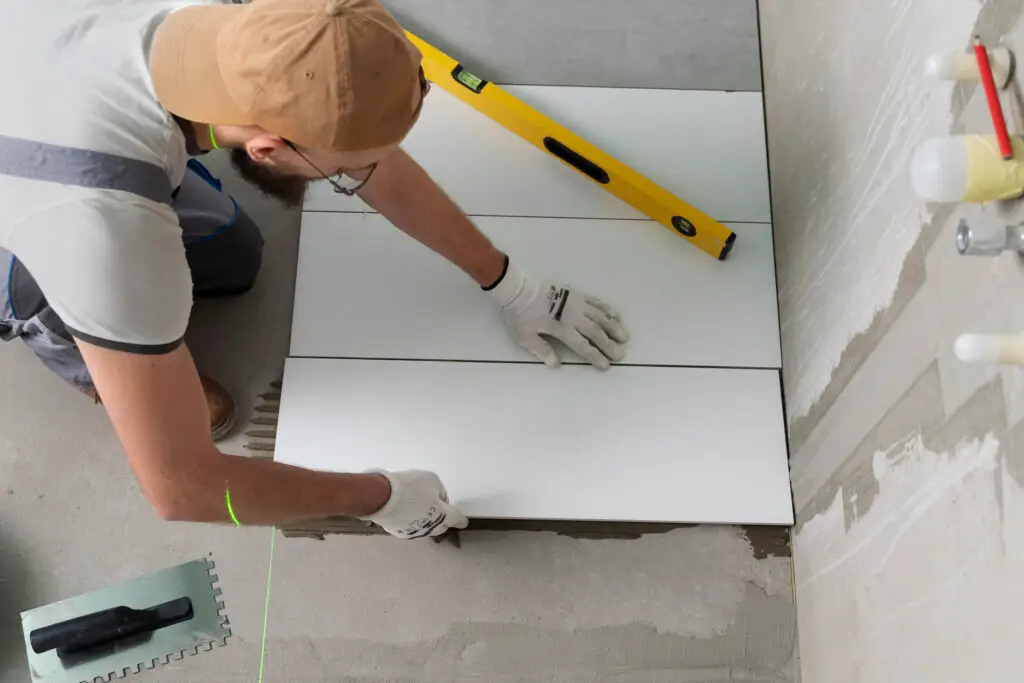
Laying the Slabs: Practical Tips from Experts
Your 900×600 council paving installation’s success depends on proper laying techniques. Professional contractors use specific methods that ensure these substantial concrete slabs remain stable and last longer. Let’s look at the key steps that separate amateur work from professional results.
Priming Slurry Application for Better Bonding
🧪 Priming slurry is a thin, cementitious material that improves adhesion between the mortar bed and paving slabs by a lot. This significant step has two main goals:
- It creates a strong bond that reduces the risk of slabs detaching from their mortar bed
- It works as a moisture barrier and prevents water absorption that could cause staining
You need to apply the slurry primer to each 900×600 council slab’s underside right before laying. A medium-sized paintbrush (3-4 inches) works best to ensure even coverage without overloading which prevents drips. Porcelain paving requires this step, but concrete council slabs benefit equally from it to prevent efflorescence and last longer.
Mortar Mix Consistency and Application
🧱 A 5:1 ratio of sharp sand to cement makes the perfect mortar mix for bedding 900×600 council paving slabs. The mix should be:
- Firm enough to hold shape when trowelled
- Pliable enough for minor adjustments
- Neither too wet nor too dry
Place about 50mm depth of mortar where each slab will sit. Small peaks slightly above your guide string line ensure complete bedding when you tamp down the slab. Many professionals add SBR bonding agent to boost adhesion and limit moisture transfer.
Aligning and Spacing the Slabs Correctly
📏 Large-format 900×600 council slabs need precise alignment. These slabs should have joint widths of at least 3mm. You might need wider joints (around 10mm) to handle slab irregularities.
Each row of slabs needs to be level both ways with a slight run-off in one direction for drainage. A spirit level check on each slab before moving to the next is essential. Tile spacers or levelling systems help avoid lippage where edges of adjacent slabs don’t line up.
❓ FAQs About Laying Council Slabs
Should I wet council paving slabs before laying? No. Slabs need to be dry and dust-free before you apply priming slurry and lay them.
How long before I can walk on newly laid 900×600 council slabs? The mortar needs at least 24 hours to set properly before you can walk on the slabs.
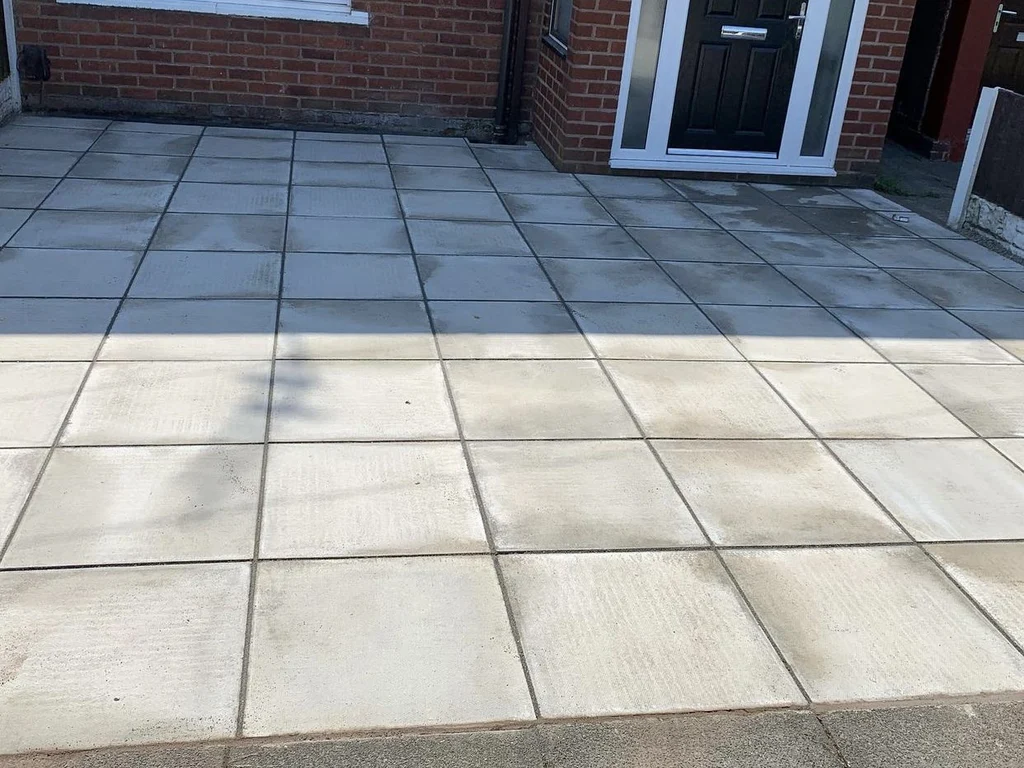
Finishing Touches: Jointing and Sealing
The finishing touches make all the difference in durability and appearance after laying your 900×600 council paving slabs. Your paving installation will last longer and look better with proper jointing and sealing.
Choosing the Right Jointing Compound 🧪
The jointing material between your council paving slabs does more than look good—it provides significant structural stability. Epoxy-based compounds like Pointfix work best for 900×600 concrete slabs.
Pointfix is a two-pack multi-use jointing compound. One pack contains epoxy resin and the other has epoxy hardener. The mixture creates a permanent hard jointing material that’s really durable when mixed properly. You don’t need to measure liquids or powders separately, unlike traditional sand and cement mortar.
These jointing compounds come in five colours (Mushroom, Buff, Brown, Grey, and Black) that can match or contrast with your council slabs. The 50/50 mixing ratio lets you prepare just what you need, which reduces waste.
Getting the joint width right matters—you need at least 6mm width and 24mm depth for the best results. Good joint preparation stops future problems like weed growth or sand erosion.
How to Apply Pointfix for 7m² or 21m² Coverage 🛠️
Make sure all joint voids are clean and free from dirt. The paving must sit on a class 1 mortar bed without any voids.
Application steps:
- Mix equal proportions from both packs until uniform in colour
- Pour the mixture onto the paved area
- Brush into gaps using a soft brush/broom
- Compact firmly into joints using a jointing tool
- Brush off excess and wipe with a damp sponge
One pack covers about 7.5m² for 900×600 council slabs with 10mm joint width and 24mm depth. You’ll need three packs to cover larger areas around 21m².
The mixture needs 12 hours to cure at 15-20°C—temperature affects curing time. Don’t apply when temperatures might drop below 6°C during curing.
Sealing Options for Weather Protection 🌧️
Sealing your council paving slabs isn’t required but offers great benefits. Quality sealants protect against stains, weeds, and fading colours.
Two main types of sealants are available:
Traditional topical sealants create a protective surface layer that blocks liquids. They cost less but trap moisture and might change your council slabs’ slip resistance.
Impregnating sealants work differently by soaking into the stone. They let it breathe while protecting it. They cost more upfront but bond better with the paving and don’t change its look or grip.
❓ FAQs About Jointing and Sealing
Can I lay 900×600 concrete slabs without jointing compound? You can, but it’s not recommended because proper jointing stops weeds and keeps the paving stable long-term.
How long before I can walk on newly sealed council paving slabs? Wait 4 hours before walking and at least 24 hours before driving on it.
FAQs and Common Mistakes to Avoid ❓
Installing 900×600 council paving slabs needs careful attention. Even experienced DIYers make mistakes sometimes. You can save time, money and avoid frustration by knowing the common pitfalls before starting. Here are answers to questions people ask about these big concrete slabs.
Can I Lay 900×600 Concrete Slabs Without Mortar? ❓
You can do it—but it’s not a good idea. Sand-based or dry-laying techniques exist, but they don’t work well with 900×600 council slabs because of their size and weight.
Skipping mortar might look like a shortcut, but it creates serious problems:
- Stability issues: Slabs become uneven and move around without proper mortar bedding
- Reduced lifespan: Installations without mortar don’t last nearly as long
- Drainage problems: Water collects under slabs and erodes supporting materials
You’ll need at least 150mm of compacted MOT Type 1 if you really want to skip cement. But expect more upkeep and likely problems compared to using traditional mortar bedding.
What Causes Slabs to Crack or Shift? ⚠️
Your paving can fail for several reasons:
- Insufficient base preparation: Most failures happen due to poor sub-base depth or compaction
- Poor mortar bed: Wrong mortar mix or uneven application
- Ground movement: Clay soils that expand and contract cause big problems
- Freeze-thaw cycles: Trapped water freezes and expands, which cracks the slabs
- Dot-and-dab installation: Mortar spots leave gaps under slabs instead of full bedding
Hollow sounds when you walk on paving usually mean there are gaps underneath—whether from bad installation or later settlement.
How Long Before I Can Walk on the Slabs? ⏱️
You need patience after laying 900×600 council paving slabs:
- Original setting: Stay off new slabs completely for 24 hours minimum
- Light foot traffic: Wait between 24-48 hours before walking on the area
- Full usage: Give it 3-7 days before putting heavy items or furniture
Moving too fast can create “rockers”—slabs that wobble when stepped on—and you’ll need to redo everything.
Do I Need to Seal Concrete Council Paving Slabs? 🛡️
Sealing isn’t mandatory but offers great benefits:
- Protection: Sealed slabs resist stains from oil, food, and plant matter better
- Reduced maintenance: Cleaning sealed surfaces takes less work
- Enhanced appearance: Some sealers make colours pop and add a slight shine
- Weather resistance: Good sealants help prevent frost and water damage
Let the paving cure fully—usually 2-4 weeks after installation—before applying sealer. Plan to reapply every 2-4 years for the best protection.
Conclusion
Council paving slabs sized 900×600 need careful planning and execution. The results are worth the effort. These reliable concrete flags make an excellent choice for commercial and residential use because of their durability, slip resistance, and economical benefits, especially when you have high-traffic areas.
Good ground preparation is the key to successful installation. You’ll need to excavate to the right depth, use quality MOT Type 1 sub-base material, and set proper drainage gradients. These steps improve the longevity of your paving by a lot. Time spent during preparation reduces maintenance needs later.
The laying process needs close attention to detail. Priming slurry helps create a strong bond between slabs and mortar. The right mortar consistency allows even settling. You should arrange and space the slabs correctly to avoid future problems like lippage or uneven surfaces. These steps might seem time-consuming at first, but they’re significant for professional results.
Quality jointing compounds and proper sealants protect your investment from weather damage and make it last longer. Products like Pointfix give excellent protection while keeping your paving project looking great.
This piece gives you the knowledge to handle your paving project confidently. Note that rushing any stage can get pricey with mistakes. By doing this expert guidance, you’ll create a durable, attractive paved area that improves your property’s value for years.
🛠️ Final Installation FAQs
How much does professional installation of council paving slabs typically cost? Professional installation generally ranges from £70-£100 per square metre, though prices vary depending on your location, site conditions, and project complexity. This includes labour, materials, and ground preparation costs.
Will council paving slabs be suitable for my sloped garden? Yes, though additional steps must be taken. Step formations or terracing techniques become necessary for steeper slopes. It also needs better drainage planning to prevent water pooling or erosion issues on sloped surfaces.
Key Takeaways
Master the installation of 900×600 council paving slabs with these essential insights for a professional, long-lasting result.
• Proper ground preparation is non-negotiable: Excavate 200mm depth with 150mm compacted MOT Type 1 sub-base to prevent future sinking and movement.
• Use priming slurry and correct mortar mix: Apply slurry primer to slab undersides and use 5:1 sharp sand to cement ratio for optimal bonding strength.
• Allow adequate curing time: Wait 24-48 hours before walking on newly laid slabs and 3-7 days before full usage to prevent damage.
• Invest in quality jointing compounds: Use epoxy-based products like Pointfix with minimum 6mm width joints for structural stability and weed prevention.
• Consider sealing for enhanced protection: Apply quality sealant 2-4 weeks after installation to prevent staining and improve weather resistance.
Following these expert guidelines ensures your 900×600 council paving project delivers professional results that withstand heavy traffic and harsh weather conditions for years to come.
FAQs
Q1. What is the best method for laying 900×600 council paving slabs? Start by laying slabs along the wall, ensuring they’re level and have a slight fall for drainage. Then lay the front edge of the patio, creating a frame. Fill in the middle, using a long straight edge to maintain level across the front and back.
Q2. Is it necessary to use mortar when installing council paving slabs? Yes, using mortar is essential for a stable and long-lasting installation. While it may seem quicker to lay slabs on sand, this often leads to shifting and unevenness over time. A proper mortar mix ensures better stability and longevity.
Q3. How long should I wait before walking on newly laid council paving slabs? Allow at least 24-48 hours before light foot traffic on newly laid slabs. For full usage, including placing heavy items or furniture, wait 3-7 days to ensure proper setting and avoid damage.
Q4. Should I seal my concrete council paving slabs after installation? While not strictly necessary, sealing offers significant benefits. It helps protect against staining, reduces maintenance, enhances appearance, and improves weather resistance. Apply sealer 2-4 weeks after installation for optimal results.
Q5. What causes council paving slabs to crack or shift after installation? Common causes include insufficient base preparation, poor mortar bedding, ground movement (especially in clay soils), freeze-thaw cycles, and improper installation techniques like dot-and-dab methods. Proper installation and ground preparation are crucial to prevent these issues.
Show facts